


Let customers speak for us

Fast

I like the Jasmine scent the best. I use it in my step in tub that has jets so
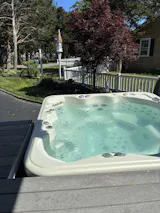
I don't use bubble bath products. I treat my tub as I used to treat my
outdoor spa.

Works great! Was fairly easy to install. Only wish I had seen the model that had the heater attached to the back that is able to slide up and down. Had to flex the distribution manifold back a bit in order to make that connection. New control panel is much nicer than the old one. Sales rep Jeremy was very helpful with getting the unit configured correctly.

Only place online I can find that filter at a reasonable price and deliver fast great company to order spa product !

Great and reasonable price for that product is

I am not sure why I hadn't ordered this years ago but WOW it is amazing. So happy I purchased this product.

My hot tub is kind of old searched for filter and found the Spa store had 1 Great price and fast delivery
Thanks

It wasn't listed to necessarily fit the 2022 Hot Springs SX, but it was a drop in replacement for me, even the base holes lined up perfectly. I had to rotate the pump to 3 O'Clock, but this was expected. So Far so good, no issues, I highly recommend.

This lubricant worked as advertised, I recommend in dealing with plastic and rubber components.

Pump works great! Larger motor fit good.. plenty of room for it. Fantastic customer service. Sent pictures and received great recommendation of what to order! Thank you!

Works great! Replaced an older 2004 spa circ pump. Thanks

Spa Control came exactly as ordered. I did call with a question on the audio plug and they had the answer in a snap. Thank You. **** Stetson. Endless Summer Sales
Spa depot prompt delivery. You get the order in less then 6 days
